Showing posts with label Crafts. Show all posts

5.14.2011

Project: Message Boards

Whipped up these little darlings for my sister-in-law as a graduation gift!
A little message board/photo display system made out of mini shutters...

Went to my local re-store looking for shutters a little bigger than the ones I ended up with, but when I saw them I thought they would be just the right size for a desk or something.
They didn't look too bad before...

So I just removed the old hinges, sanded slightly and gave them a new coat of fresh spray paint.
Added a couple of cute clips and they were done!

Originally I thought about finding some pictures of her kids and putting them in the slats but I really didn't have very many on my end and the ones she has on Facebook are from last year but so I ended up attaching the graduation card, which was a little to large to fit in the slats, and some cutie post-its.

Note to anyone who wants to do this project: The smaller the shutter, the smaller the clips you should get. The clips I found I felt pushed the slats out too wide. Also, if you can get them bigger this would make an awesome Christmas card holder. If you got a slatted closet door you could hang it sideways and stick photos in that way too. OOOOH, I like that last one. I think I just changed my mind about the art I was going to do over my couch!

Anyway, way to go JANA! WOOT WOOT! So proud of you for finishing!

4.17.2011

I think I'm in love.

Came across this today...

THE MOST AMAZING CRAFT & SEWING ROOM EVER!


You can find the whole scoop on this woman's sewing room here.
You will DIE when you look at all the little details she uses in her space, like using pipe straps from the hardware store as drawer pulls for her bins...


Or how she keeps her thread and matching bobbins together with a golf tee with a little daisy glued to the top...

Basically I could go on and on and on but I will let you look for yourself. Prepare to drool.
I basically need this. Not want, NEED!
I have this crafty spirit inside of me waiting for a space like this so I can go crazy!!!

4.03.2011

Project: Burp cloths and Diaper Cake

So my friend was having a baby shower and I have given her several things, such as JR's infant car seat and stroller and his bumbo, but I wanted to do something else for her as well. She is using cloth diapers but is open to a few disposables as well and since I had some already rolled up diapers from when I was making a diaper cake a while ago I decided to make one for her. My main problem was that I only had enough diapers for two tiers so I decided to make some simple burp cloths for the top.
I have seen several variations for these diapers using different ribbons and such but I really only had time to do something simple and I am still an inexperienced sewer so I stuck to simple fabric rectangles.

Here is what you need:
1. A package of Gerber cloth diapers (they come in a 12 pack)
2. 1/4 yard of six different coordinating fabrics...
(this will provide enough to make two cloths from each fabric)
3. Thread
4. Scissors
5. Iron

Here is what the cloth diaper package looks like along with the fabrics I used...

You can pre-wash and shrink your fabric and diapers but make sure to iron them. When you get the fabric it will be in a long, skinny strip. Fold it in half and cut it at the fold. These will be your two strips that you sew onto the diaper. Take one strip and fold the shortest edge over 1/2 inch and iron it, then do this to one of the longer sides. At this  point I lined my straight-edge-measurey-thingy (you know, the one that comes with your standard rotary cutter and mat in a kit?) up along the long folded edge and then flipped the fabric on the other side over the top and then slid the straight-edge-measurey-thingy out and ironed again. I could have just measured but this seemed easy and it was the perfect size.
This is what it should look like (yes, you leave the very end unfolded)...

Trim your corners...

Take a cloth diaper and center your fabric in the middle of it and pin at the corners. Be aware that the ends of the diapers are very uneven so just line it up best you can but they won't be straight. In hind sight I would have folded the long edges first and the short edges last and flipped them over the end of the cloth diaper. Oh well. 

Make sure you pin your fabric RIGHT SIDE up because this isn't something you are flipping. Pin everything but that unfolded edge you left at the end. The reason you leave this edge unfolded is because the cloth diapers can vary in length. When you get to this end fold it to the correct length and pin it too. Then you are ready to sew. Just start at one corner and go around the edge or the rectangle, backing up and sewing each corner a couple of times.

They come out looking like this...

And the back looks like this...

And if you centered it well when you fold the two cloth diaper sides together on the back it should look like this...

You could fold them in a stack like this and tie a cute little ribbon on them. But of course I used them for my diaper cake.

Diaper cakes are easy.
What you need:
1. Diapers
2. Rubber bands
3. Elastic head bands
4. A couple of bottles
5. Decorations (binkey's, blocks, theme oriented items)

Step one is to take all your diapers and roll them and wrap them with a rubber band. You can use bigger diapers for the bottom tier and get smaller as you go up or use all the same size like I did.
To begin assembling set your bottle in the middle and one of your elastic headbands around it. Start putting the rolled diapers around the bottle. They may be hard to keep up at first but once you get enough in there the headband will help hold them up. I like to stuff mine as full and firm as possible. If you want your cake to be smaller, just tie the headband tighter once your circle is the right size.

Since I used smaller diapers the bottle sticks out high enough that I could start building the second tier right around it the way I did the first. If you use bigger diapers you may need to use another bottle for the second tier. Since the second tier is obviously smaller I did end up tying off the headband on this one to make it firm and tight!

I rolled my burp cloths in the same manner as the diapers and assembled them around another bottle but used a regular rubber band to hold them.

One of the fabrics I used was a remnant sold to me 50% off and I used strips of it to tie around those unsightly headbands and I tied a ribbon around the burp cloths right over the rubber band.

Then you can start adding your decorations. I went simple and just used fabric lollipops.

For the top I ended up using some fun pinwheels!

So cute and fun! Do you guys like?


3.18.2011

Project: Aprons!

A while back I made these little people aprons for my tiniest nieces and nephews! I have also made them for myself and my sister-in-law and I owe my other, bigger nephews aprons too (if they want them). I didn't do a tutorial but I still wanted to post the pictures.


Aren't they cute? I am still working on my sewing skills so all my family members end up with my crappy projects! These were pretty good for my first time though!

3.13.2011

JR's Big Boy Room: Silhouettes

This project was so cute and awesome in my mind and sooooo lame the way it came out. Okay, it isn't really that lame, it was just so much better in my mind and I had built it way up before I even started.

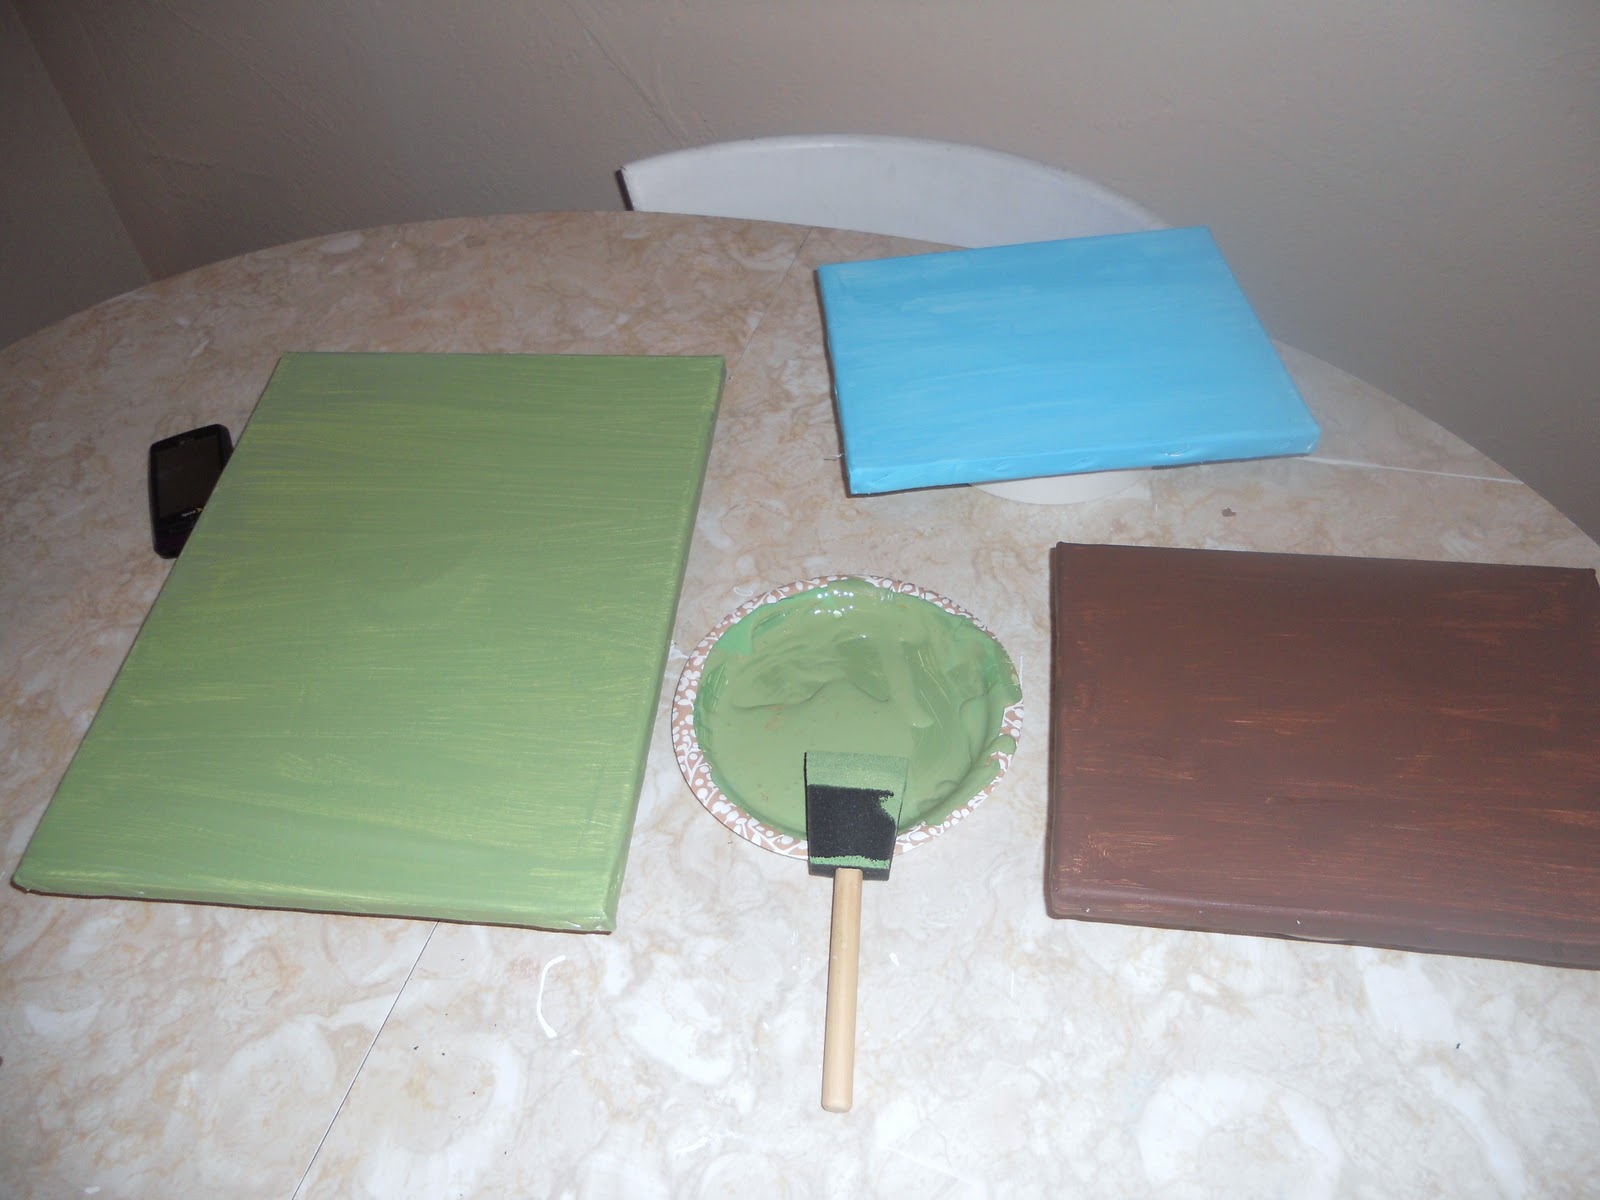
So I ordered some thin adhesive vinyl stickers in white of a dump truck, an earth mover, and a semi-truck. These cost me about $13 total. My original plan was to buy some cute scrap booking paper and apply the stickers there and then frame them. For some reason though in the back of my mind I had this idea just to paint canvases in three different colors and put the stickers on them, and that is what I decided to do.

I bought two different sizes of canvases, just the good old Wal Mart kind, and also a couple of acrylic paint colors I needed.

I painted each of my canvases with just one coat and let them dry to the touch.

I wanted them to have a whitewashed look so after they were dry I painted over them with white acrylic paint and then, remembering a technique I had learned at a class where I painted a custom clock, I just wiped the white paint off with a wet wipe!

I started wiping in the center in a sort of circular patters, I wanted to have more white on the edges and more color in the center.
I even added more white paint to the edges and then wiped again...

Once they were all dry I hated them. Really, I did. I wanted to go back to my original idea of using the scrap booking paper and picture frames. The problem was that I wanted to see what the canvases would look like with the vinyl but those of you who have worked with vinyl before know that it can only be applied once. The other problem was that I had already paid for and painted the canvases, plus the new paint colors I needed for this project and nothing could be returned to pay for the picture frame idea. really I paid under $20 for all those supplies and I am sure I will use the leftovers in the future, but still, I am cheap and I do have a budget!

So I went ahead and applied the stickers. And I applied the dump truck with the canvas laying horizontally when I meant to have that one vertically which made me despise the project even more.  In the end they really did not turn out that bad, I just built up what they could have been so high in my mind that I am disappointed in the results.

So my next projects are to make crib sheets with matching fabric from the bunting and to find a good aqua colored fabric for a new quilt.

Also, What to do with the random space in this cabinet where I tore the fabric out that the old owners had in there. See all those staples and cotton bits? Unless I pull those all out that part is not getting painted! Might have to put more fabric back in there...

3.11.2011

JR'sBig Boy Room: Fabric Bunting Tutorial

I saw this fabric bunting tutorial and I knew it would be perfect for JR's room. It took several trips to the fabric store with JR and then one final trip without him to get the perfect fabrics but I finally found some that I liked. I was just going to pick about four fabrics and use each of them twice but I ended up finding eight different ones.

I searched high and low for my rotary cutter because it allows me to cut more easily and more than one piece at a time if I so desire but my regular fabric scissors would have worked just as well.

Some of my supplies...

I ended up wanting my pennants to be bigger than the pdf on the other site's tutorial so I used the entire length of the short edge of my 1/4 yard of fabric as the top of the pennant and just eyeballed it. The only problem I came across was on my favorite fabric 1/4 yard was not enough to make the pattern run the right direction. Oh well.

The top edge is the connecting one, the right and left sides are the cut edges...

I should have cut them facing sides together to save a step but oh well, it didn't take long to flip them and pin them. Pin the bottom point and then the right and left sides about 3/4 an inch from the top...

Then you will be ready to sew. I used my Pixie craft sewing machine from Singer that I got at a garage sale or something. It had never been used and the price was right so I picked it up but I had never used it until now. It worked great! I don't think I could ever sew anything other than fabric to fabric but it is perfect for my little projects!

Sew from the pin mark on the right side down to the point and then back up to the left pin mark. Make sure at each pin mark you back up and sew over it a couple times. Then you are ready to turn the triangles right side out.  Pull apart the fabric at the tip.

(My camera did some wiggity-wack things in a few of my pics, hope it just needs a new SD card or something...)

Start tucking the tip to the inside...


Find a pen, skewer (or in my case I used some random kitchen tool that came with my knife set and I have no idea what it is for but I have used it for crafts on several occasions) and put it into the tip and start flipping the fabric right side out. Push fabric out one of the holes you left on the right or left top side.

It will look like this...

But my grandmother would never approve of that flat tip so I got a pin and picked it out until it was as pointy as I could get it!

Now at the top where you left two holes on the right and left tuck in the unsewen fabric so it looks like more of a finished edge...

After this it is smooth sailing. You just iron the triangles and then sew about 3/4 an inch from the folded edge across the top (seam will hit the bottom of the holes you just tucked in) and then you are ready to thread the pennants onto your ribbon or cord or twine. I put big beads between each of mine.


This was one of the easiest, fastest projects I have ever done from start to finish. A lot of times tutorials will say how easy stuff is but the people doing them are master sewers and crafters. I always start projects that are supposed to be easy and get burned out half way through but this one wasn't sew! Hehe.

I think I may add some fabric letters that say "JR" to one of the pennants somewhere. What do you think?


3.07.2011

Project: JR's Tool Box

JR got a set of plastic Home Depot tools for Christmas (some of which Bandit used as chew toys) and I have wanted to get a tool box or something to put them in.
Then a few weeks ago I saw this wood box with a handle at Fred Meyer and it was 60% off the clearance! It think it ended up being about $3 total.


I wanted to personalize it so I got some cheap-o stencils and my orange acrylic paint and a little foam brush and went to town!


I know that you are supposed to line up the letters and tape them down so they are straight and all that but I was not about to be a perfectionist on this particular project so I just eyeballed it! I even painted outside the lines in a couple of spots! I think the finished product was perfect though!