Showing posts with label JR's Big Boy Room. Show all posts

3.13.2011

JR's Big Boy Room: Silhouettes

This project was so cute and awesome in my mind and sooooo lame the way it came out. Okay, it isn't really that lame, it was just so much better in my mind and I had built it way up before I even started.

So I ordered some thin adhesive vinyl stickers in white of a dump truck, an earth mover, and a semi-truck. These cost me about $13 total. My original plan was to buy some cute scrap booking paper and apply the stickers there and then frame them. For some reason though in the back of my mind I had this idea just to paint canvases in three different colors and put the stickers on them, and that is what I decided to do.

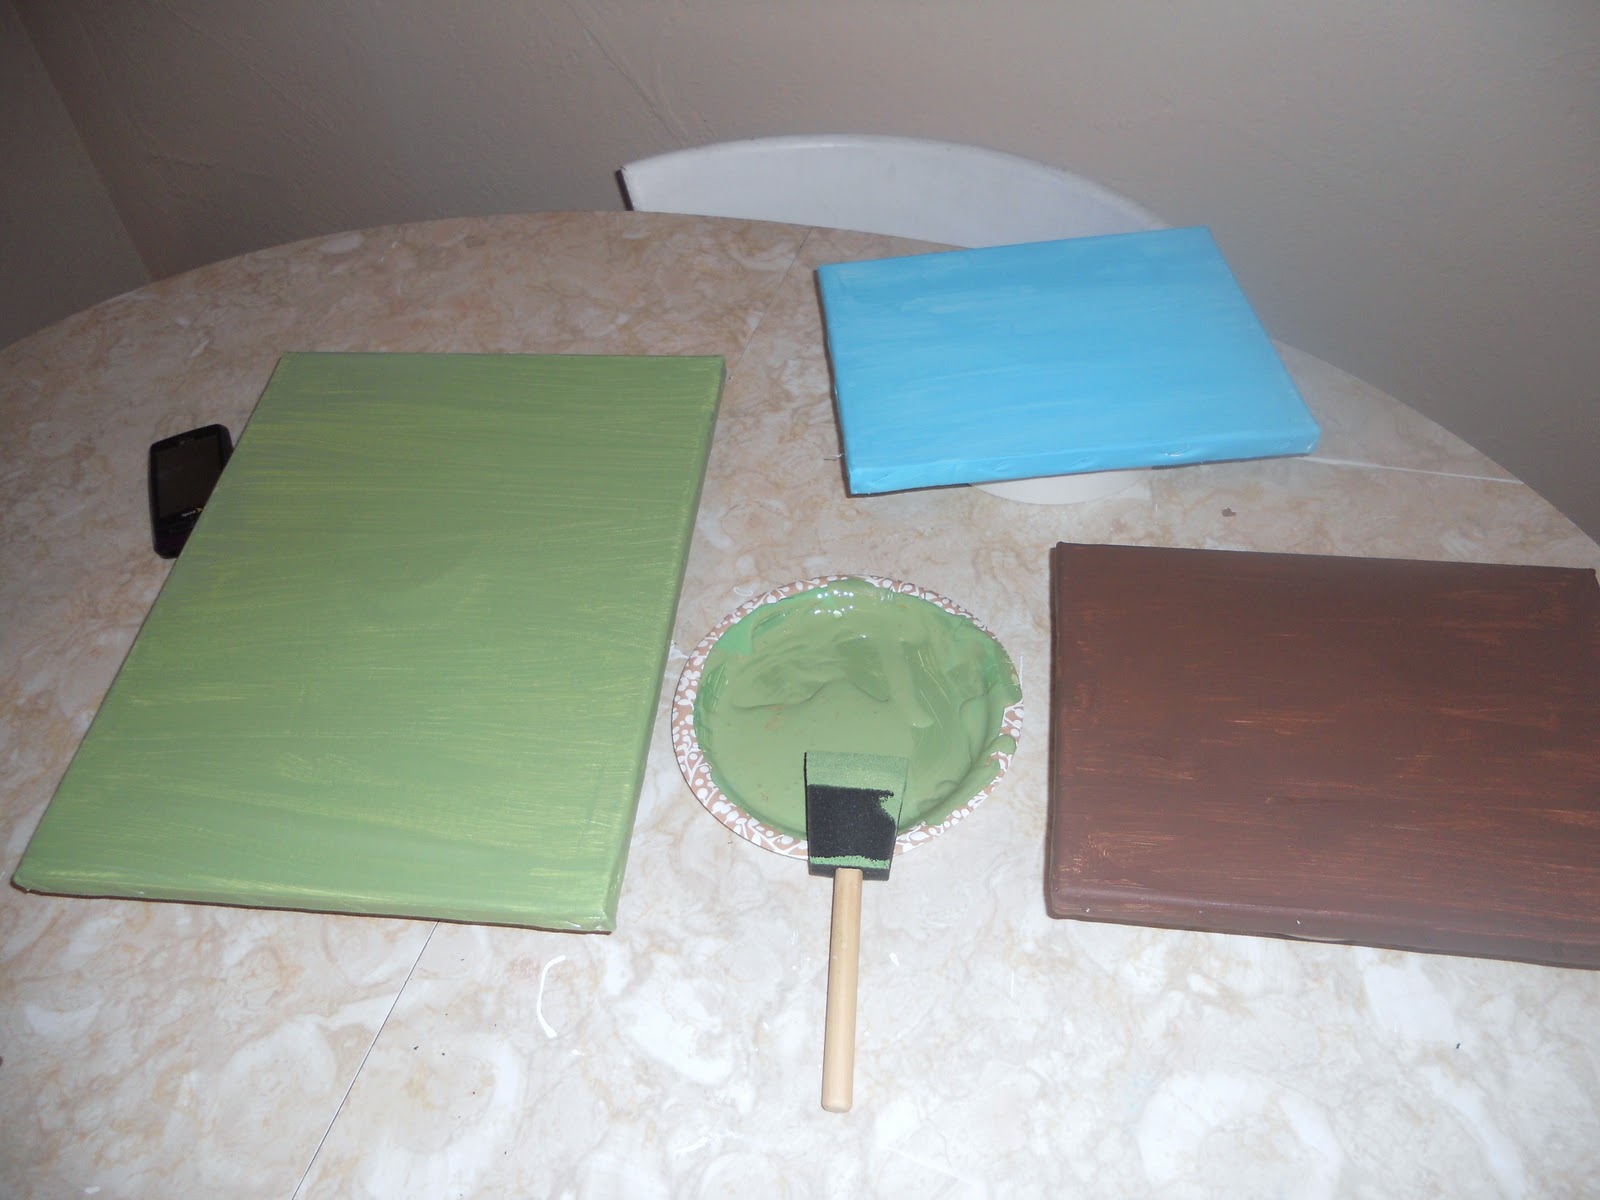
I bought two different sizes of canvases, just the good old Wal Mart kind, and also a couple of acrylic paint colors I needed.

I painted each of my canvases with just one coat and let them dry to the touch.

I wanted them to have a whitewashed look so after they were dry I painted over them with white acrylic paint and then, remembering a technique I had learned at a class where I painted a custom clock, I just wiped the white paint off with a wet wipe!

I started wiping in the center in a sort of circular patters, I wanted to have more white on the edges and more color in the center.
I even added more white paint to the edges and then wiped again...

Once they were all dry I hated them. Really, I did. I wanted to go back to my original idea of using the scrap booking paper and picture frames. The problem was that I wanted to see what the canvases would look like with the vinyl but those of you who have worked with vinyl before know that it can only be applied once. The other problem was that I had already paid for and painted the canvases, plus the new paint colors I needed for this project and nothing could be returned to pay for the picture frame idea. really I paid under $20 for all those supplies and I am sure I will use the leftovers in the future, but still, I am cheap and I do have a budget!

So I went ahead and applied the stickers. And I applied the dump truck with the canvas laying horizontally when I meant to have that one vertically which made me despise the project even more.  In the end they really did not turn out that bad, I just built up what they could have been so high in my mind that I am disappointed in the results.

So my next projects are to make crib sheets with matching fabric from the bunting and to find a good aqua colored fabric for a new quilt.

Also, What to do with the random space in this cabinet where I tore the fabric out that the old owners had in there. See all those staples and cotton bits? Unless I pull those all out that part is not getting painted! Might have to put more fabric back in there...

3.11.2011

JR'sBig Boy Room: Fabric Bunting Tutorial

I saw this fabric bunting tutorial and I knew it would be perfect for JR's room. It took several trips to the fabric store with JR and then one final trip without him to get the perfect fabrics but I finally found some that I liked. I was just going to pick about four fabrics and use each of them twice but I ended up finding eight different ones.

I searched high and low for my rotary cutter because it allows me to cut more easily and more than one piece at a time if I so desire but my regular fabric scissors would have worked just as well.

Some of my supplies...

I ended up wanting my pennants to be bigger than the pdf on the other site's tutorial so I used the entire length of the short edge of my 1/4 yard of fabric as the top of the pennant and just eyeballed it. The only problem I came across was on my favorite fabric 1/4 yard was not enough to make the pattern run the right direction. Oh well.

The top edge is the connecting one, the right and left sides are the cut edges...

I should have cut them facing sides together to save a step but oh well, it didn't take long to flip them and pin them. Pin the bottom point and then the right and left sides about 3/4 an inch from the top...

Then you will be ready to sew. I used my Pixie craft sewing machine from Singer that I got at a garage sale or something. It had never been used and the price was right so I picked it up but I had never used it until now. It worked great! I don't think I could ever sew anything other than fabric to fabric but it is perfect for my little projects!

Sew from the pin mark on the right side down to the point and then back up to the left pin mark. Make sure at each pin mark you back up and sew over it a couple times. Then you are ready to turn the triangles right side out.  Pull apart the fabric at the tip.

(My camera did some wiggity-wack things in a few of my pics, hope it just needs a new SD card or something...)

Start tucking the tip to the inside...


Find a pen, skewer (or in my case I used some random kitchen tool that came with my knife set and I have no idea what it is for but I have used it for crafts on several occasions) and put it into the tip and start flipping the fabric right side out. Push fabric out one of the holes you left on the right or left top side.

It will look like this...

But my grandmother would never approve of that flat tip so I got a pin and picked it out until it was as pointy as I could get it!

Now at the top where you left two holes on the right and left tuck in the unsewen fabric so it looks like more of a finished edge...

After this it is smooth sailing. You just iron the triangles and then sew about 3/4 an inch from the folded edge across the top (seam will hit the bottom of the holes you just tucked in) and then you are ready to thread the pennants onto your ribbon or cord or twine. I put big beads between each of mine.


This was one of the easiest, fastest projects I have ever done from start to finish. A lot of times tutorials will say how easy stuff is but the people doing them are master sewers and crafters. I always start projects that are supposed to be easy and get burned out half way through but this one wasn't sew! Hehe.

I think I may add some fabric letters that say "JR" to one of the pennants somewhere. What do you think?


2.27.2011

Big boy room

So I never did quite decorate JR's baby nursery the way I wanted to. I received a gift from my boss before he was born with the cutest little pant and shirt set that was monkey themed and she also included the most adorable matching monkey.


I thought this guy was the perfect inspiration for JR's room. I made a rag quilt to match and I got an orange crib skirt which gave a nice pop of unexpected color and brought out the smile on the monkey's face. I framed some of his preemie baby clothes in shadow boxes but never hung them up and I always planned on doing some other cute orange accents and just never got around to it.

Then I decided since I have a little storage cabinet in his room that has branches as hooks on the side of it that I was going to make his room a woodland creatures theme and I started sewing some felt pillows in the shapes of an owl, raccoon and fox like these ones...


I haven't finished any of them yet (story of my life) and now I have run out of steam on the project realizing that JR is going to be two in just over a month! I think what this kid needs now if a fun but more neutral themed room that he can grow into. I want to keep the basics the same, like his orange bed skirt and chocolate and tan accents. The furniture is already black so that is fine, but I think I will switch up the color palette a tiny bit. What do you think of this?


Never in a million years am I going to paint that, but I was thinking it would be so cheap and easy to bring in those colors with a project like this bunting...


There is the easiest tutorial here and she suggests putting beads between the pennants which I LOVE! She also has the most adorable matching pillow on her left sidebar but I don't know if I have the skills for something like that!

I am not in a rush to do it so if anyone has any more ideas for me give me a ring! We will totally set up a craft day and work on projects together!

When I do get it all done though I think I am going to convert the little man's crib into his toddler bed though. So sad he is getting too big! I am mostly not looking forward to him being able to get out of bed when he wants though!